Setting up Siddhi SDK
1) When creating a new Siddhi project
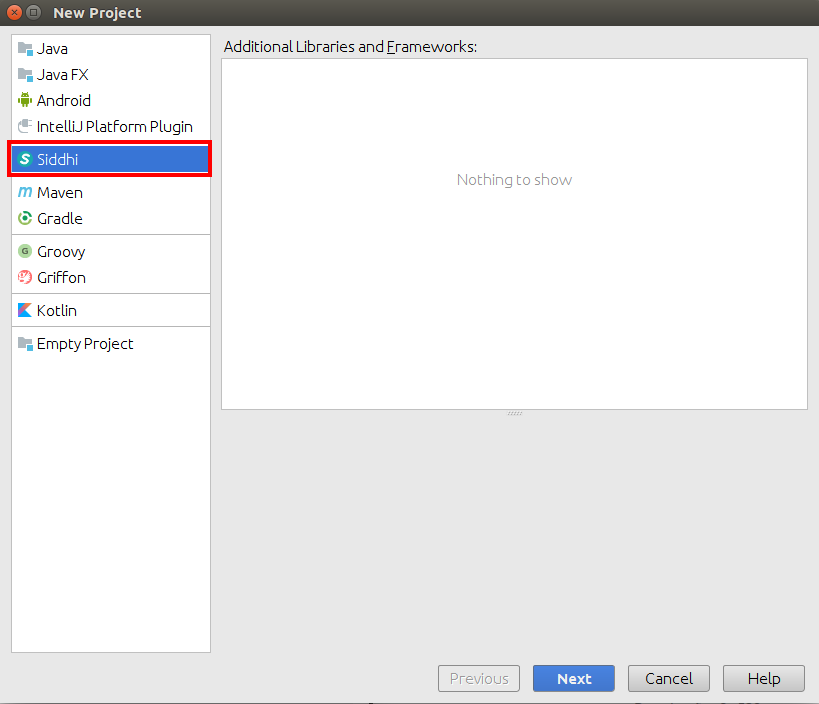
1) Go to File -> New -> Project and select Siddhi project and select Next.
2) If you have previously configured the Siddhi SDKs, they will appear in the next window. You can select a SDK and continue with project creation by selecting Next.
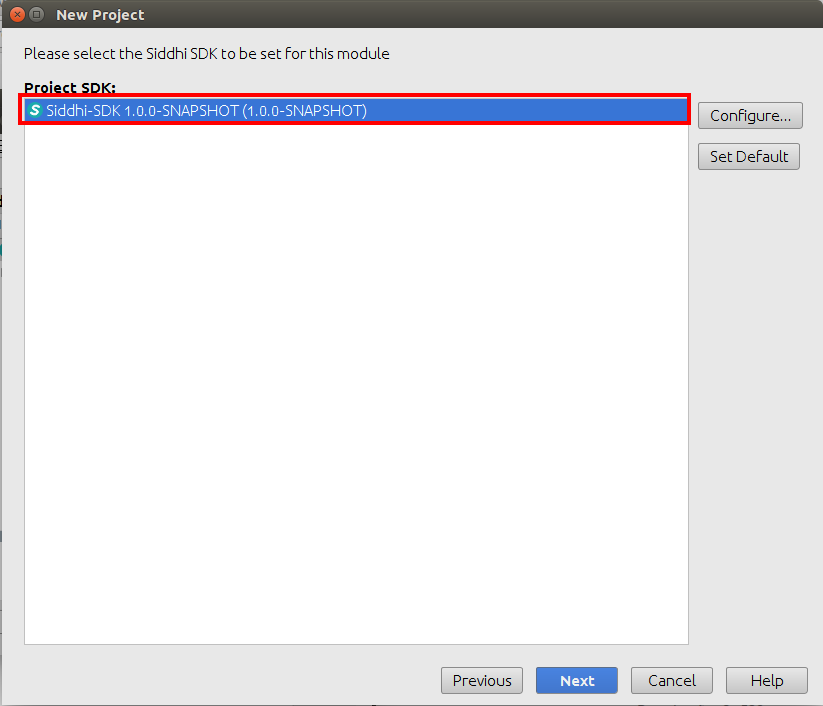
If the Siddhi SDK was not configured previously, you can add a new Siddhi SDK by selecting Configure.
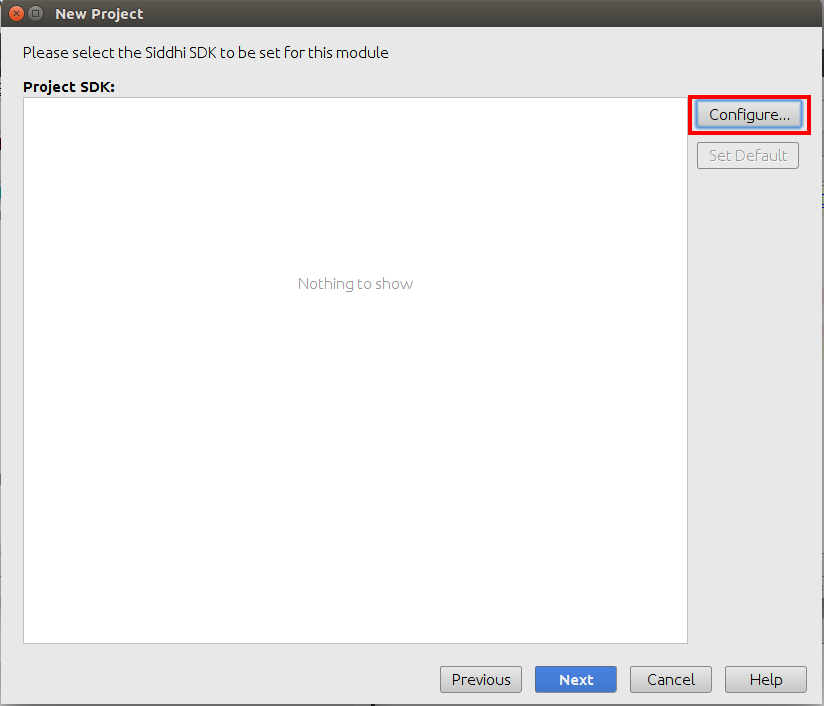
3) Select the Siddhi distribution location.
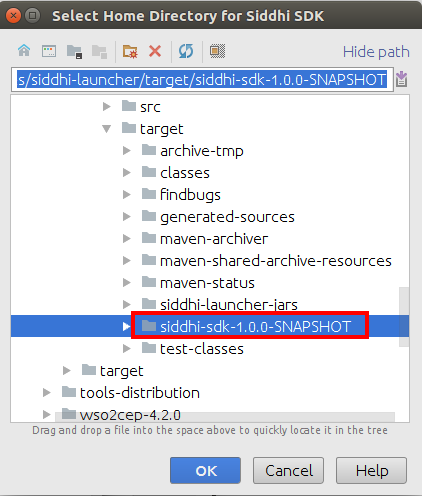
4) Now you have successfully added the Siddhi SDK. You can select Next and continue with project creation.
2) After creating a Siddhi project
1) Go to File -> Project Structure and select Project tab. If you have previously added the Siddhi SDK, you can select the SDK from the drop down menu.
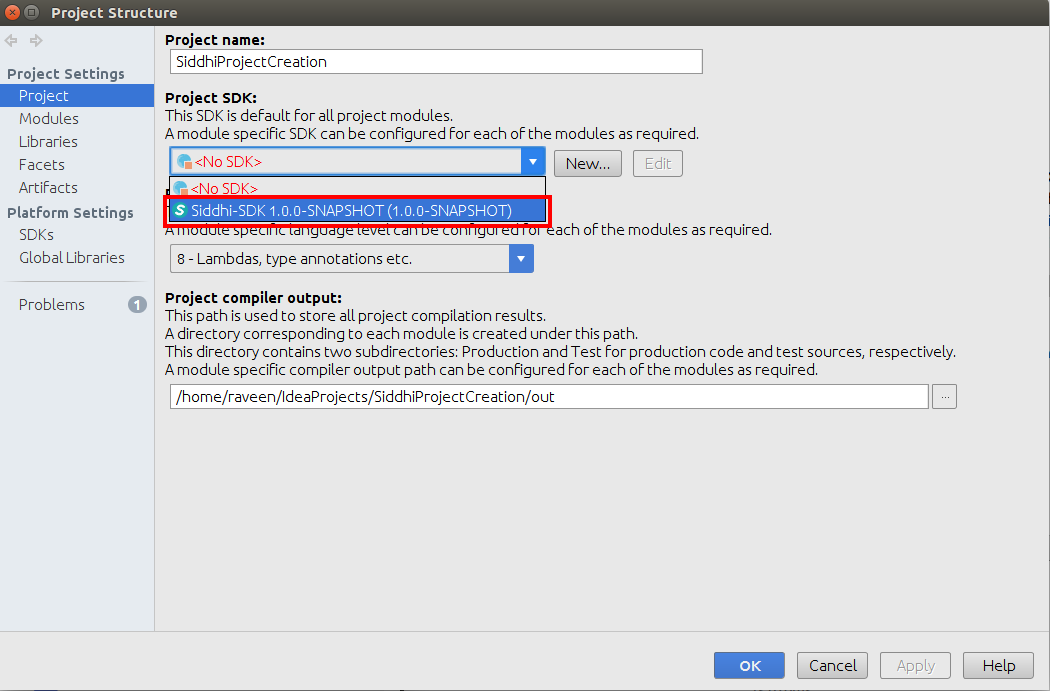
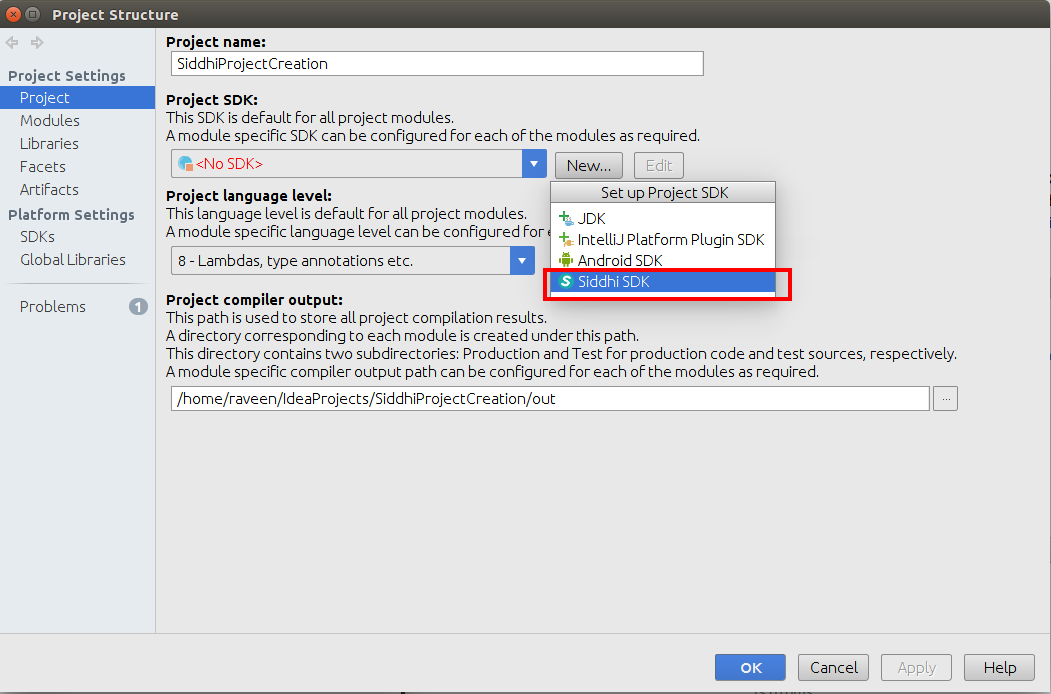
If a Siddhi SDK is not added previously, you can add a new SDK by selecting the New button under the Project SDK and selecting Siddhi SDK.
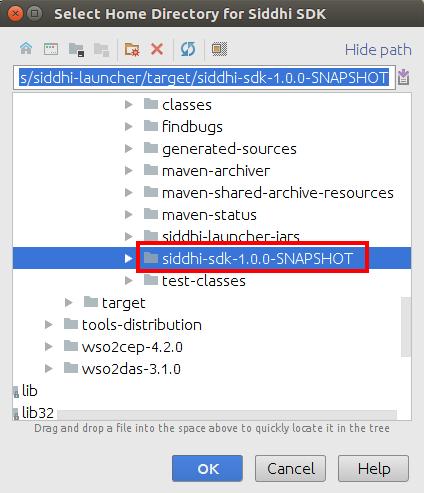
2) Select the Siddhi distribution location.
3) Now you have successfully added the Siddhi SDK to the project.
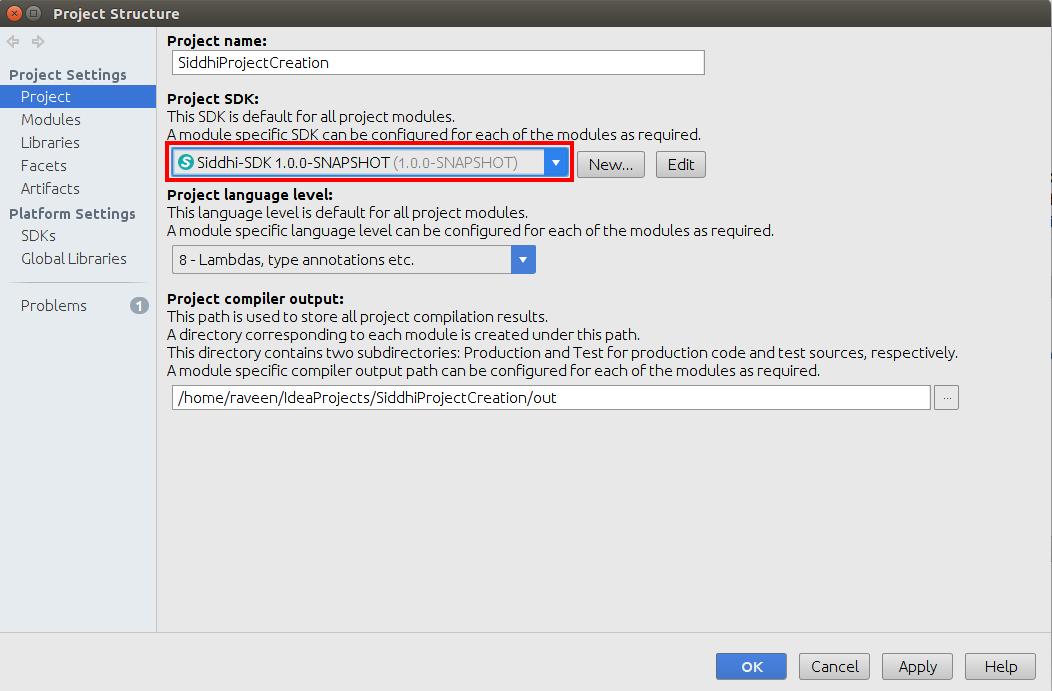
4) Select OK or Apply to save changes.
Previous Step: Download Siddhi SDK.
Go to Home: Home